Classroom
2. Webpages with FrontpageExpress
In this classroom you will learn how easy it is to make a webpage with the Editor "FrontpageExpress". You just put your pictures, text and links where you want it and the Editor will write the html-code for you.
"FrontpageExpress" often comes as part web browser “Internet Explorer” and you can install it from the CD-Rom.
If it´s not there you can download it from the following adress:
http://multimedia.launc.tased.edu.au/frontpage_express.htm
After downloading it simply click on the program-icon and run throught the installing-process. When you start "FrontpagExpress" you will find the menu bar down below. The explanations to the numbered symbols are further down.
Typing text into FrontpageExpress is much like entering text into a word processor. If you know how to deal with Word97 you will know to use "FrontpageExpress". Simply type the text in.
Let me start the fun with an explanation of the menue bar. You can print this out and use it as an overview. Also you can move your mouse over the menu and little signs will tell you what button does what for you.
(1) Here you can start a new html-document.
(2) This will open an already existing html-document.
(4) If you have highlighted text or graphics (move your mouse over it while holding down the mouse button) you can cut it out with the scissors.
(5) Her you can copy objects that you marked and…
(6) …paste them where you put your cursor.
(7) A very important button! If you do something wrong to your piece of art you can undo it by pressing here.
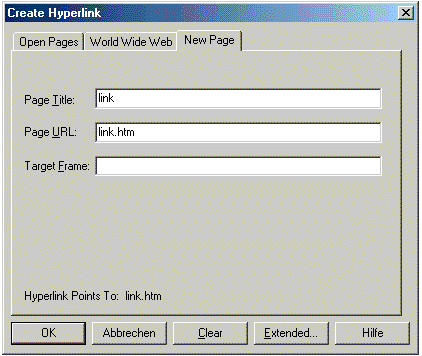
To put in a link to one of your own webpages click on the registercard “new page” and put in your filename and the title of your site (the title will be shown at the very top of your browser-window).(graphic on bottom)
(12) At this pull-down-menu you can chose between different fonts for your text.
(13) With the big “A” make your text-size bigger, with the smaller “A” you can size your text down.
(14) Makes your text bold.
(15) Makes it italic.
(16) Makes it underlined.
(17) At this symbol you can chose your text colour.
(18) Click on either the right, centre, or left buttons and the cursor will move to that part of the page. So you can align text and pictures to the right, centre, or left of your web page.
(19) With these two buttons you can increase and decrease indents.

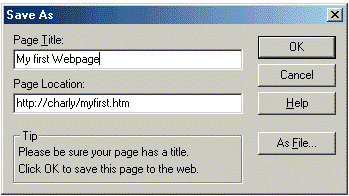
(3) Clicking on this disc-symbol will save your work. By the first time you click on it the computer will ask you were on your computer you want to save the document und you have to choose where it will go by clicking on “browse” (on the left hand side of the box) and then clicking on the folder where the rest of your website is stored. You should save all your files in the same folder.

(9) This symbol allows you to insert a graphic into your page. You have to have a graphic-file in a .jpg, .gif or .bmp-format before. After pressing the symbol just browse on your computer to the graphic file and pick it up. Keep in mind that you should use only small graphics to speed up the loading time of your page.
(8) With this button you can insert tables to organize your homepage better. Otherwise it is not possible to put text right beside a grafic. Table properties can be set in the top menu bar under “Tables”.

(11) You can set up different formatting-styles like “Headings”, “Address”, “Bulleted List”…
(10) This is very important, because the whole internet is made out of hyperlinks that connects all the webpages of the world. Mainly you can insert a link that is pointing to a page of your own or a page of somebody else somewhere else in the net.
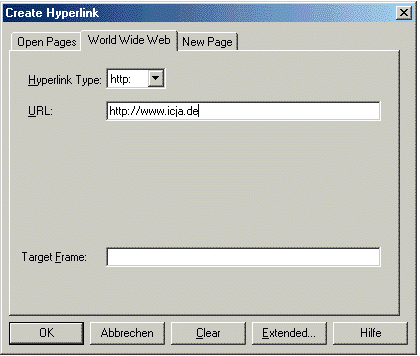
Look at the grafic. A link that goes out in the www klick on the registercard “www” and insert the webadress you want your link to targeting. (graphic on top)


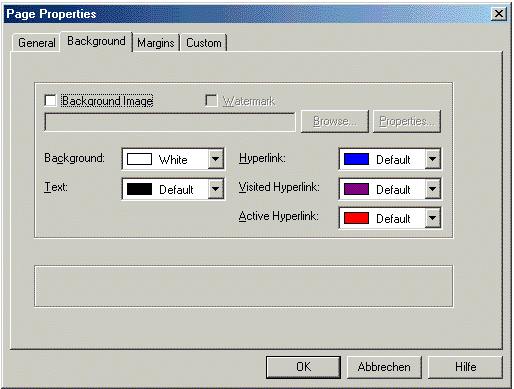
As you can see, with this drop-down menu you can choose the background, text, and link colours. By clicking the checkbox for the “Background Image” you can browse through your computer and put in the “wallpaper” for your homepage. Check out the resources in our library or in the internet for loads of background-wallpapers.
Basically you will learn to handle FrontpageExpress by trying things out. Learning by doing is the motto. There is only one important thing I need to tell you right away: How to set up the general page properties. For that click on "Format" (Top menu bar) and Background and the following menu appears:
